A poorly fitted mouthguard is almost as bad as no mouthguard at all. It shifts during sparring, makes breathing difficult, and gives you a false sense of protection. Knowing how to fit a boxing mouthguard correctly takes less than five minutes and can save your teeth, jaw, and thousands in dental bills. This mouthguard fitting guide walks you through the entire boil and bite mouthguard process so your guard fits like it was made for you.
– Boil-and-bite mouthguards use thermoplastic that softens in hot water and molds to your teeth
– The entire fitting process takes about 5 minutes
– Water temperature should be around 160–170°F (70–77°C) — not a rolling boil
– You get roughly 20–30 seconds to mold before the material re-hardens
– Most guards can be re-molded 2–3 times if the first attempt is off
1. What You Need Before You Start
Before you heat any water, gather everything so the process runs smoothly. Boil-and-bite fitting is time-sensitive — once that guard comes out of the hot water, you have a narrow window to shape it. Having your supplies within arm’s reach prevents fumbling and wasted attempts.
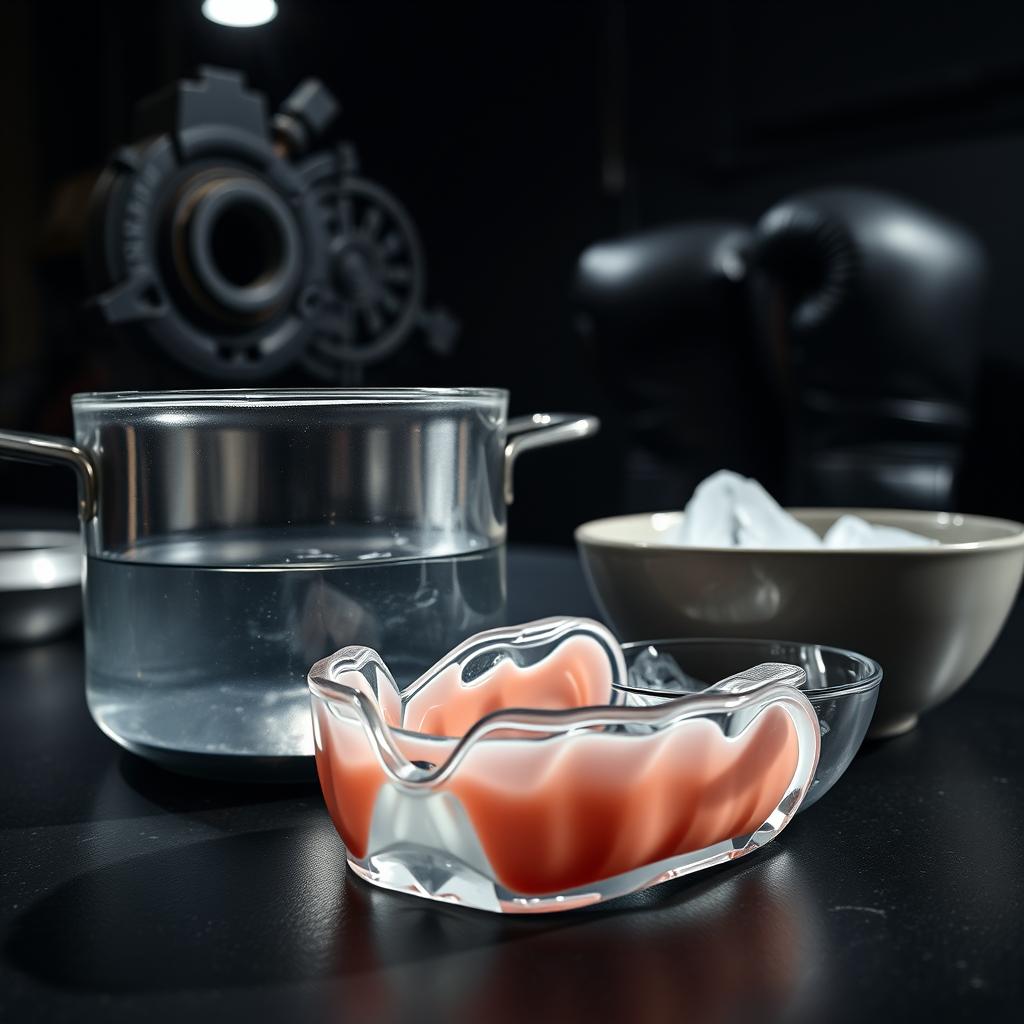
Here is what to have ready:
– A medium saucepan or pot filled with water
– A slotted spoon, fork, or tongs for retrieval
– A bowl of cold or ice water
– A timer (your phone works fine)
– A mirror so you can center the guard on your teeth
– A clean towel
– The mouthguard itself, still in its packaging with the manufacturer’s instructions handy
Read the instructions that came with your specific guard. Brands like Shock Doctor, Venum Challenger, OPRO, and Everlast each have slightly different soak times and temperature recommendations. Always defer to the manufacturer’s guidance over generic advice.
2. Boiling the Water — Getting the Temperature Right
Fill your saucepan with enough water to fully submerge the mouthguard and bring it to a boil. Once you see a rolling boil, remove the pot from the heat and let it sit for 30 seconds to one minute. This step is critical because dropping a guard into violently boiling water (212°F / 100°C) can warp the thermoplastic, ruin the guard’s structural integrity, and make it too thin to protect you properly.
The target temperature after resting is roughly 160–170°F (70–77°C). This is hot enough to make the material pliable without destroying it.
Never place a mouthguard in your mouth straight out of the hot water. The thermoplastic retains heat and can scald your gums, palate, and lips. Always dip the guard in cold water for 1–2 seconds or wave it in the air for a few seconds before placing it in your mouth. If it feels uncomfortably hot on your fingertip, it is too hot for your mouth.
3. Soaking the Mouthguard
Using your slotted spoon or tongs, lower the mouthguard into the hot water. Start your timer immediately. Most boil-and-bite guards require a soak of 20 to 60 seconds — the exact duration depends on the brand and model. Here are some general timelines:
– Shock Doctor Gel Max: approximately 20–30 seconds
– Venum Challenger: approximately 25–30 seconds
– OPRO Silver/Gold: approximately 30 seconds
– Everlast EverGel: approximately 60 seconds
You will see the guard start to become visibly softer and more flexible. That is your cue. Do not leave it in the water longer than directed, because over-soaking causes the material to become too soft, resulting in a guard that is too thin after molding and offers reduced shock absorption.
If you are unsure about your specific guard’s timing, err on the shorter side. You can always re-soak for a few more seconds, but you cannot un-melt an over-softened guard.
4. Molding the Mouthguard to Your Teeth — The Critical Step
This is where most people get it wrong. Remove the guard from the hot water, give it a quick 1–2 second dip in the cold water bowl (just enough to cool the surface), and position it in front of a mirror. Center the channel of the guard over your upper teeth, press it upward into your gums, and then bite down with firm, even pressure.
Here is the correct sequence for how to mold a mouthguard:
– Center the guard over your upper teeth using the mirror
– Push the guard upward with your thumbs against the outside of the mold
– Bite down firmly with your molars first, then close your front teeth
– Use your tongue to press the guard against the roof of your mouth and behind your front teeth
– With your fingers, press the outer edges of the guard against your gums and teeth
– Hold this position for 20–30 seconds without shifting
Your tongue does more work than your jaw here. Pressing the material against the inside surfaces of your teeth and palate is what creates a secure, personalized impression. Biting alone only shapes the biting surface — the tongue shapes everything else.
Clamping down with maximum jaw force is one of the most common mistakes. Biting too hard compresses the material so much that the guard becomes paper-thin at the biting surface. This removes the shock-absorbing cushion that protects your teeth and jaw on impact. Bite firmly enough to leave clear tooth impressions, but not so hard that your teeth nearly touch through the material.
5. Setting the Shape in Cold Water
After holding your bite for 20–30 seconds, carefully remove the guard from your mouth and immediately submerge it in the bowl of cold water. Leave it there for at least 30 seconds — a full minute is better. The cold water rapidly sets the thermoplastic into its new shape, locking in the custom impression of your teeth.
While the guard sits in the cold water, do not squeeze it or press on it. Let it harden undisturbed. Any manipulation at this stage can introduce unwanted distortion.
Once the guard has fully cooled, take it out and do a test fit. Place it back over your upper teeth without biting. A well-molded guard should snap into place and stay seated without you needing to clench. Open your mouth — the guard should not fall. Shake your head gently — it should hold firm.
A properly fitted mouthguard should feel snug on your teeth, stay in place with your mouth open, allow you to breathe and speak clearly, and not require you to clench to keep it seated. If you have to bite down to keep it from falling, the fit is not right.
6. Trimming and Final Adjustments
Sometimes a boil-and-bite guard has excess material along the back edges that digs into your gums or triggers your gag reflex. This is normal and easy to fix. Use sharp scissors or a razor blade to carefully trim the rear flanges — remove small amounts at a time. After each trim, test the fit again.
If the guard extends too far back toward your molars and causes gagging, trim the posterior edges until the discomfort stops. The guard should cover your front teeth and premolars completely, and your first molars at minimum. It does not need to reach your wisdom teeth.
For fighters who wear braces or have orthodontic appliances, consider a guard specifically designed for braces, such as the Shock Doctor Braces mouthguard. Standard boil-and-bite guards can damage bracket wires if forced onto orthodontic hardware.
After your final fitting, store the mouthguard in a ventilated case — never leave it loose in your gym bag. Rinse it with cold water after every session and clean it weekly with mild soap or a denture cleaning tablet. Heat and bacteria break down thermoplastic faster than punches do.
7. Mouthguard Types Compared: Which One Is Right for You?
Not every mouthguard is built the same way. Before you spend money, it helps to understand where boil-and-bite guards sit in the hierarchy of protection. The table below breaks down the three main types you will encounter.
| Feature | Stock (Ready-Made) | Boil-and-Bite | Custom (Dentist-Fitted) |
|---|---|---|---|
| Fit | Generic, one-size-fits-all | Semi-custom, molded to your teeth | Precision-fit from dental impression or 3D scan |
| Protection Level | Minimal — often considered unsafe for contact sports | Good — adequate for training and amateur competition | Excellent — best shock absorption and jaw protection |
| Comfort | Bulky, difficult to breathe and speak | Comfortable after proper molding | Barely noticeable, natural fit |
| Breathability | Poor — must clench to keep in place | Moderate — improved with channel design | Best — designed around your bite and airway |
| Price Range | $1–$5 | $10–$35 | $100–$500+ |
| Durability | Low — degrades quickly | Moderate — lasts 6–12 months with care | High — lasts 2–5 years |
| Best For | Temporary use or light non-contact drills | Training, sparring, amateur bouts | Competitive fighters, professionals, heavy sparring |
For most boxers training regularly, a quality boil-and-bite guard from a reputable brand hits the sweet spot between protection, comfort, and cost. Stock guards should be avoided entirely for sparring. If you are competing at a serious level or have had previous dental injuries, investing in a custom guard from your dentist is worth the price. You can also browse our best boxing mouthguards roundup for specific product recommendations.
8. Common Mistakes and How to Avoid Them
Even a straightforward process like fitting a boil and bite mouthguard goes sideways when people rush or skip steps. After coaching fighters through hundreds of fittings, these are the errors that come up repeatedly.
– Over-soaking the guard — Leaving it in hot water for 90+ seconds melts the material too much, producing a floppy, thin guard that offers little cushion on impact
– Skipping the cool-down dip — Putting a guard straight from boiling water into your mouth burns soft tissue and causes you to rush the molding in pain
– Biting with only front teeth — The molars need to engage first; front-teeth-only biting creates a lopsided impression and poor retention
– Not using the tongue — Tongue pressure shapes the palate side of the guard; without it, the guard only has impressions on the biting surface
– Moving the guard during setting — Fidgeting with the guard before it fully cools in cold water warps the impression
– Giving up after one attempt — Most guards can be re-boiled and re-molded 2–3 times; if the first fit is off, try again
If you have gone through three attempts and the guard still does not fit, the guard may be the wrong size. Most brands offer youth and adult sizes, and some have small, medium, and large options. A guard that is too big or too small for your jaw will never mold properly regardless of technique.
9. When to Replace Your Mouthguard
A mouthguard is not a permanent piece of equipment. Thermoplastic degrades over time from saliva, heat, and repeated impacts. Knowing when to retire a guard is part of protecting yourself properly.
Replace your mouthguard if you notice any of the following:
– Visible cracks, tears, or holes in the material
– The guard feels loose and no longer stays seated without clenching
– The material has become thin or flat at the biting surface
– You experience new jaw pain or discomfort that was not present before
– The guard has a persistent odor even after cleaning
– It has been more than 12 months since you molded it
Young fighters whose teeth and jaws are still developing should replace guards more frequently — every 3–6 months or whenever the fit changes noticeably. For a deeper look at protective gear, check our guides on how to choose boxing headgear and what equipment you need to start boxing.
Frequently Asked Questions
1. Can I re-boil and re-mold my mouthguard if the first fit is bad?
Yes. Most boil-and-bite mouthguards can be re-heated and re-molded 2–3 times. Each re-molding slightly degrades the material, so try to get a good fit within the first couple of attempts. If the guard still does not fit after three tries, you may need a different size or brand.
2. How long should I soak the mouthguard in hot water?
Soak times vary by brand, typically between 20 and 60 seconds. Always follow the manufacturer’s instructions included with your guard. Over-soaking makes the thermoplastic too soft, which results in a thin, poorly protective guard after molding.
3. Can I use a boil-and-bite mouthguard with braces?
Standard boil-and-bite guards are not recommended for braces because the molding process can damage brackets and wires. Brands like Shock Doctor and OPRO make guards specifically designed to fit over orthodontic hardware. These models have a wider channel and softer material that accommodates brackets without damaging them. Consult your orthodontist before fitting any mouthguard over braces.
Conclusion
Fitting a boil and bite mouthguard is a simple process that most fighters rush through or skip entirely — and end up paying for it in the ring. Take your five minutes, follow the steps above, and you will have a guard that stays in place, lets you breathe, and actually protects your teeth and jaw. Your mouthguard is one of the cheapest pieces of gear in your bag, but when you take a clean shot to the chin, it becomes the most valuable. Get the fit right.
Written by the AskMeBoxing Team
 general2026.06.24Boxing Gloves Padding Types Explained – Foam vs Gel vs Horsehair Guide
 general2026.06.24Boxing for Weight Loss: How Many Calories You Actually Burn
 general2026.06.24Heavy Bag Workout for Beginners: Your First 30-Minute Session
 general2026.06.24Garage Boxing Gym Setup: The Complete Step-by-Step Build Guide